
How to Integrate with Mailchimp to get subscribers using popup
How to get Mailchimp API key:
Step 1: Log in to Mailchimp
- Go to https://mailchimp.com/
- Log in to your Mailchimp account.
Step 2: Open Account Settings
- Click on your Profile icon (top-right corner).
- Select Account & billing (or “Account” depending on UI version).
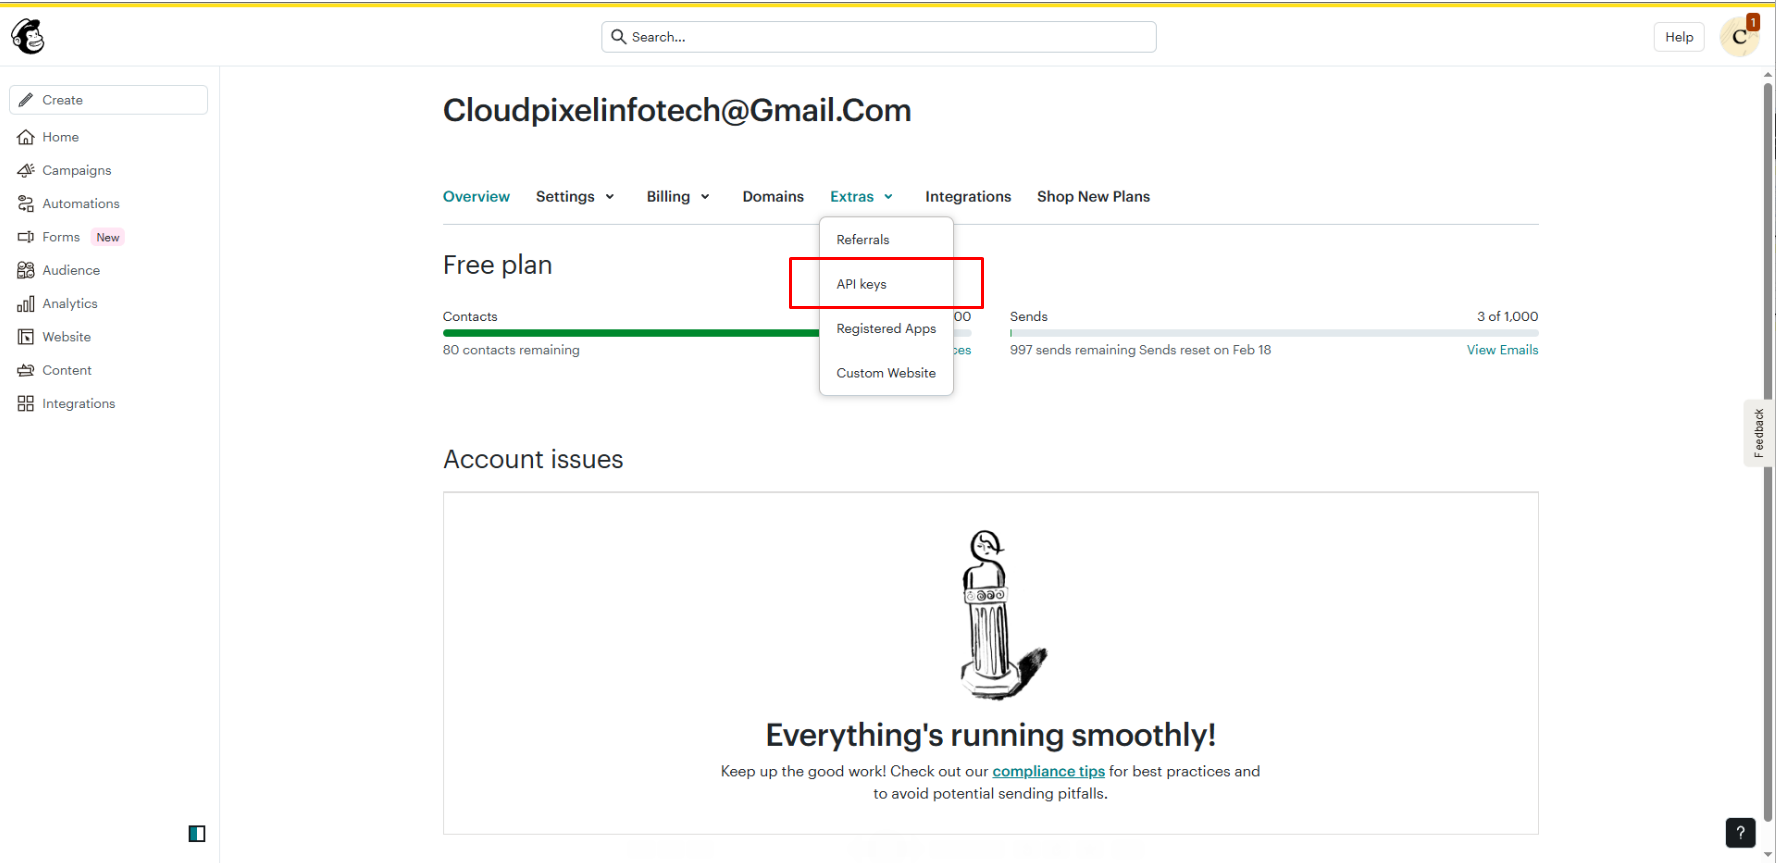
Step 3: Go to API Keys
- Click on the Extras dropdown menu.
- Select API keys.
Direct link (if logged in):
👉 https://usX.admin.mailchimp.com/account/api/
(Note: “usX” may vary based on your Mailchimp data center.)
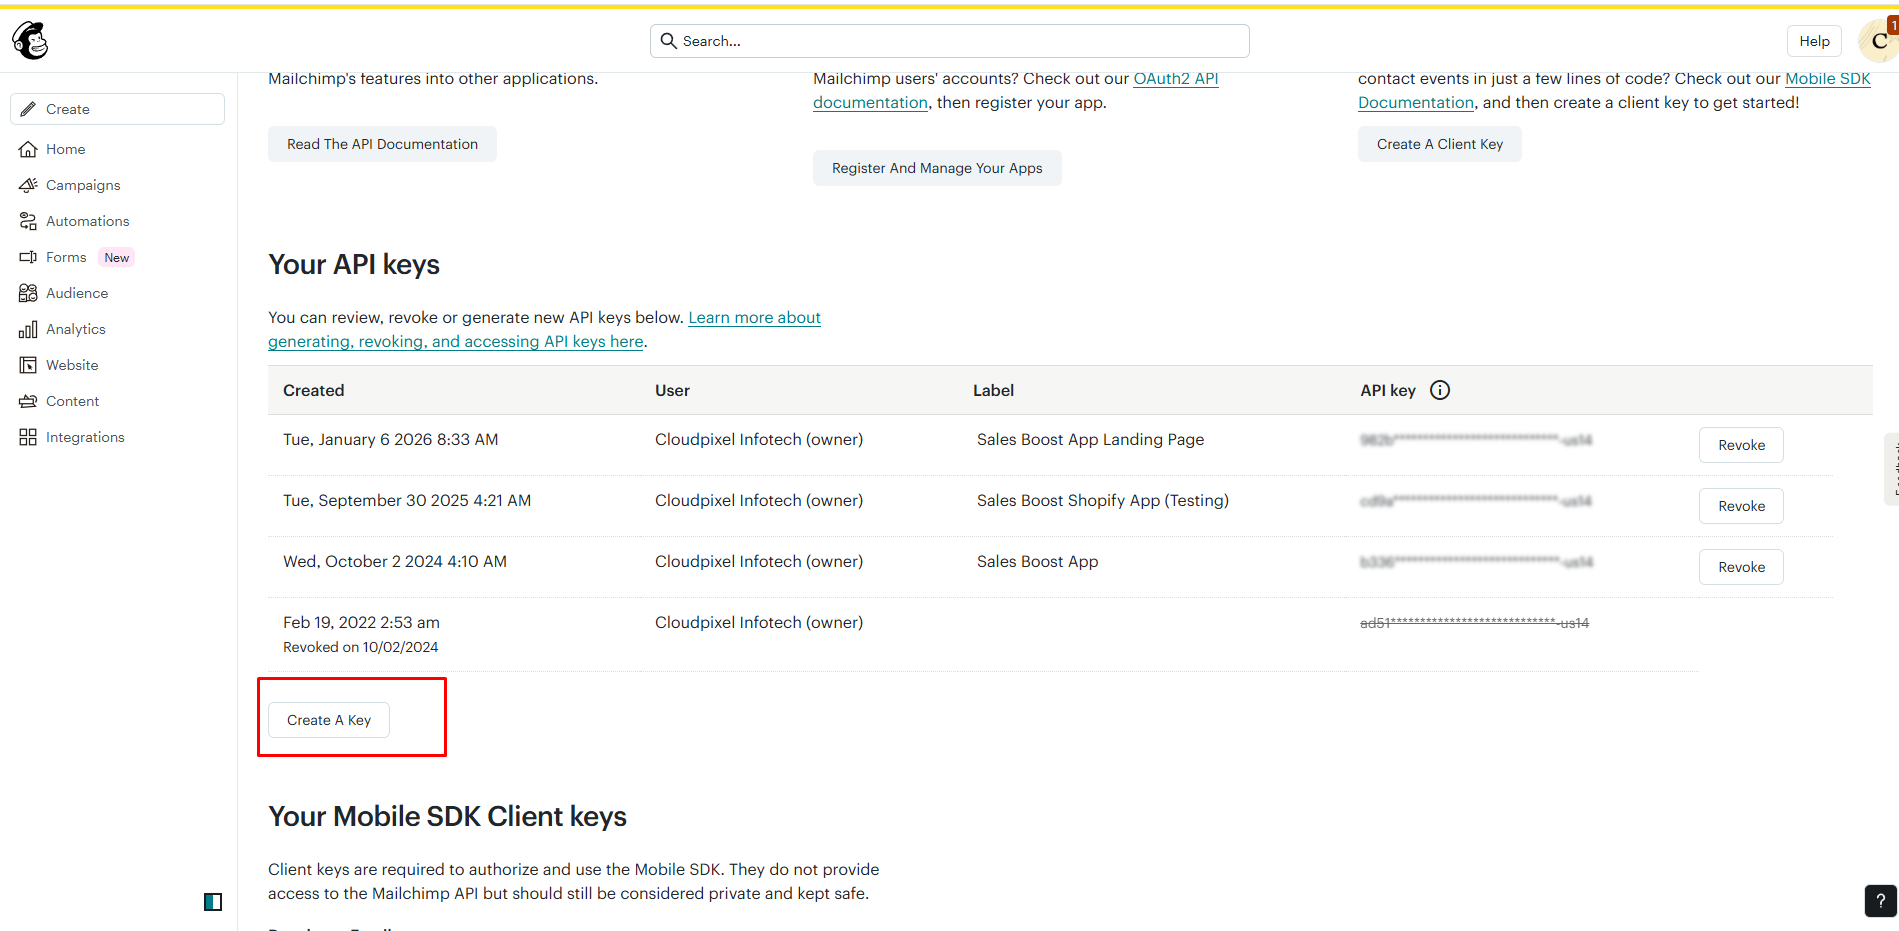
Step 4: Generate a New API Key
- Click Create A Key.
- Mailchimp will generate a new API key.
- Copy the generated API key.
Step 4: Generate a New API Key
- Click Create A Key.
- Mailchimp will generate a new API key.
- Copy the generated API key.
- Need more help?
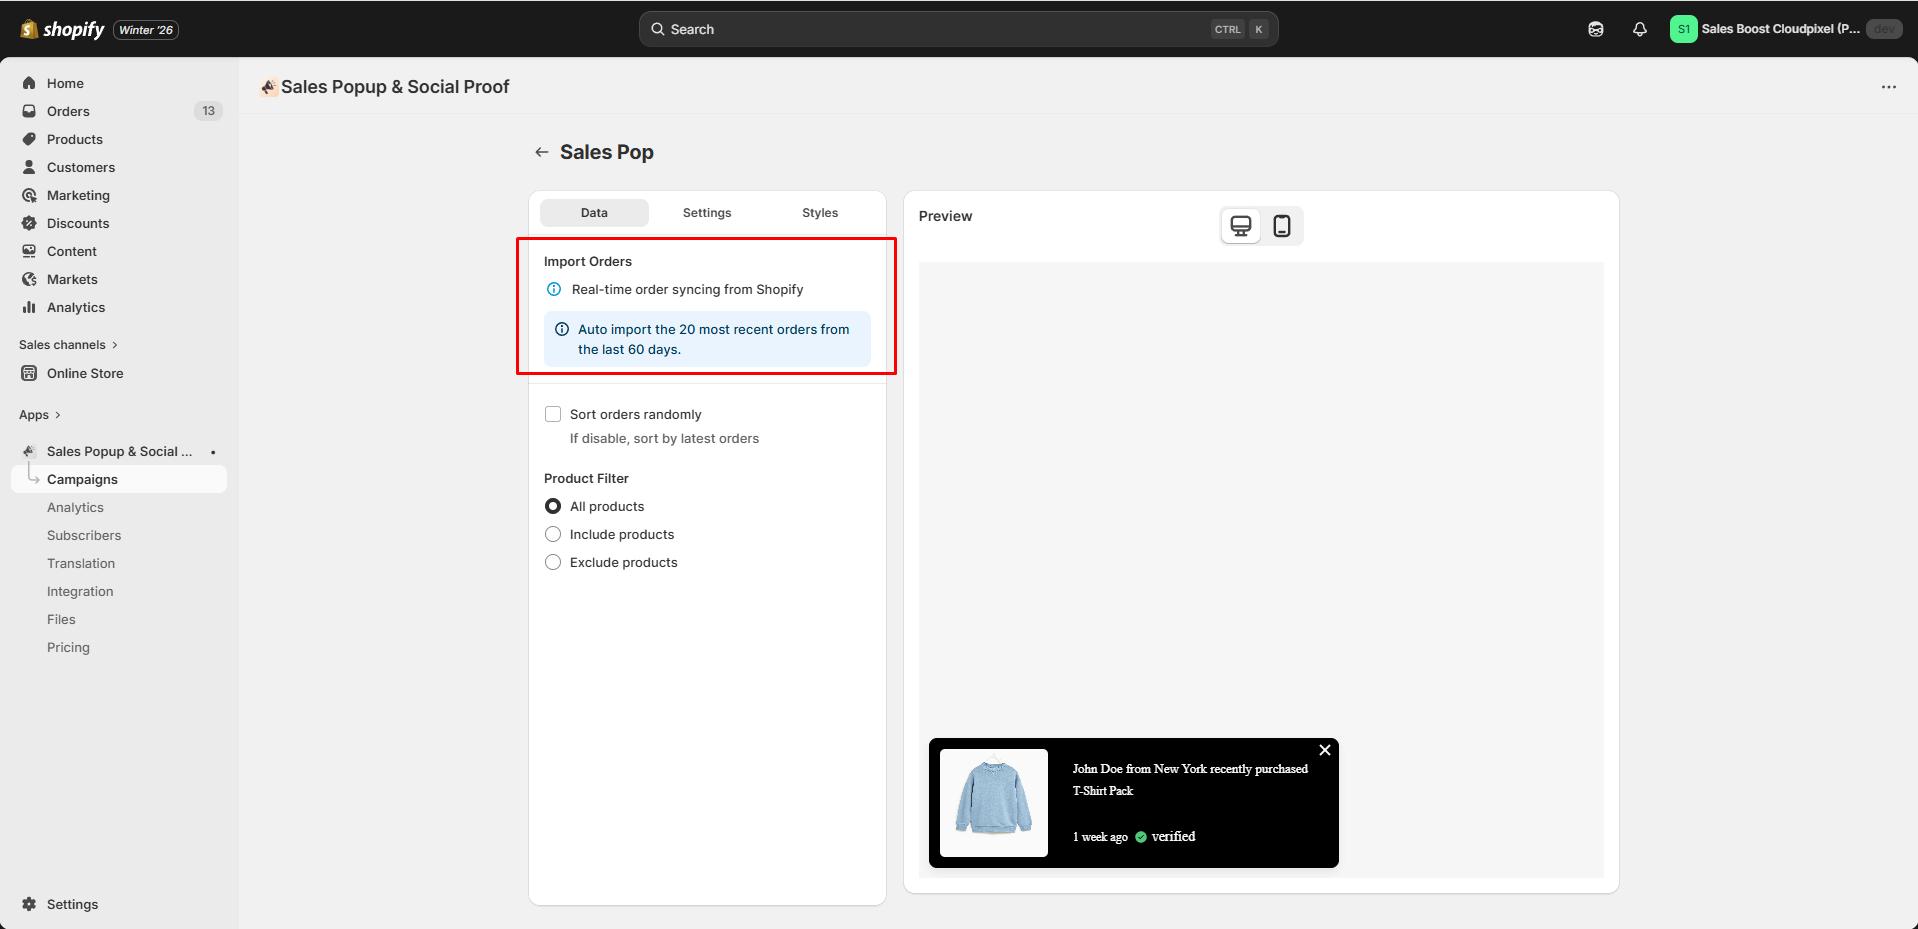
Step 5: Paste API Key in Our App
- Return to the Sales Popup Sales Proof App in Shopify.
- Go to
- Sales Popup Sales Proof
- → App Integration → Mailchimp.
- Paste the API key into the field.
- Click Save / Connect.

Need more help?
If you experience any issues or have questions, please don’t hesitate to contact our support team at support@cloudpixelinfotech.com or through our live chat – we’re here to assist you!
How to Integrate with Judge.me to show review notification
Why integrate with Judge.me
Judge.me is the most popular review app on Shopify with a proven record of good value to Shopify merchants. Sales Popup & Social Proof decided to serve our users better by integrating with this application to show your product review in our notifications, creating stronger social proof.
How to get Judge.me API key:
Step 1: Install Judge.me
You must install Judge.me on your store to use this feature. Install Judge.me.
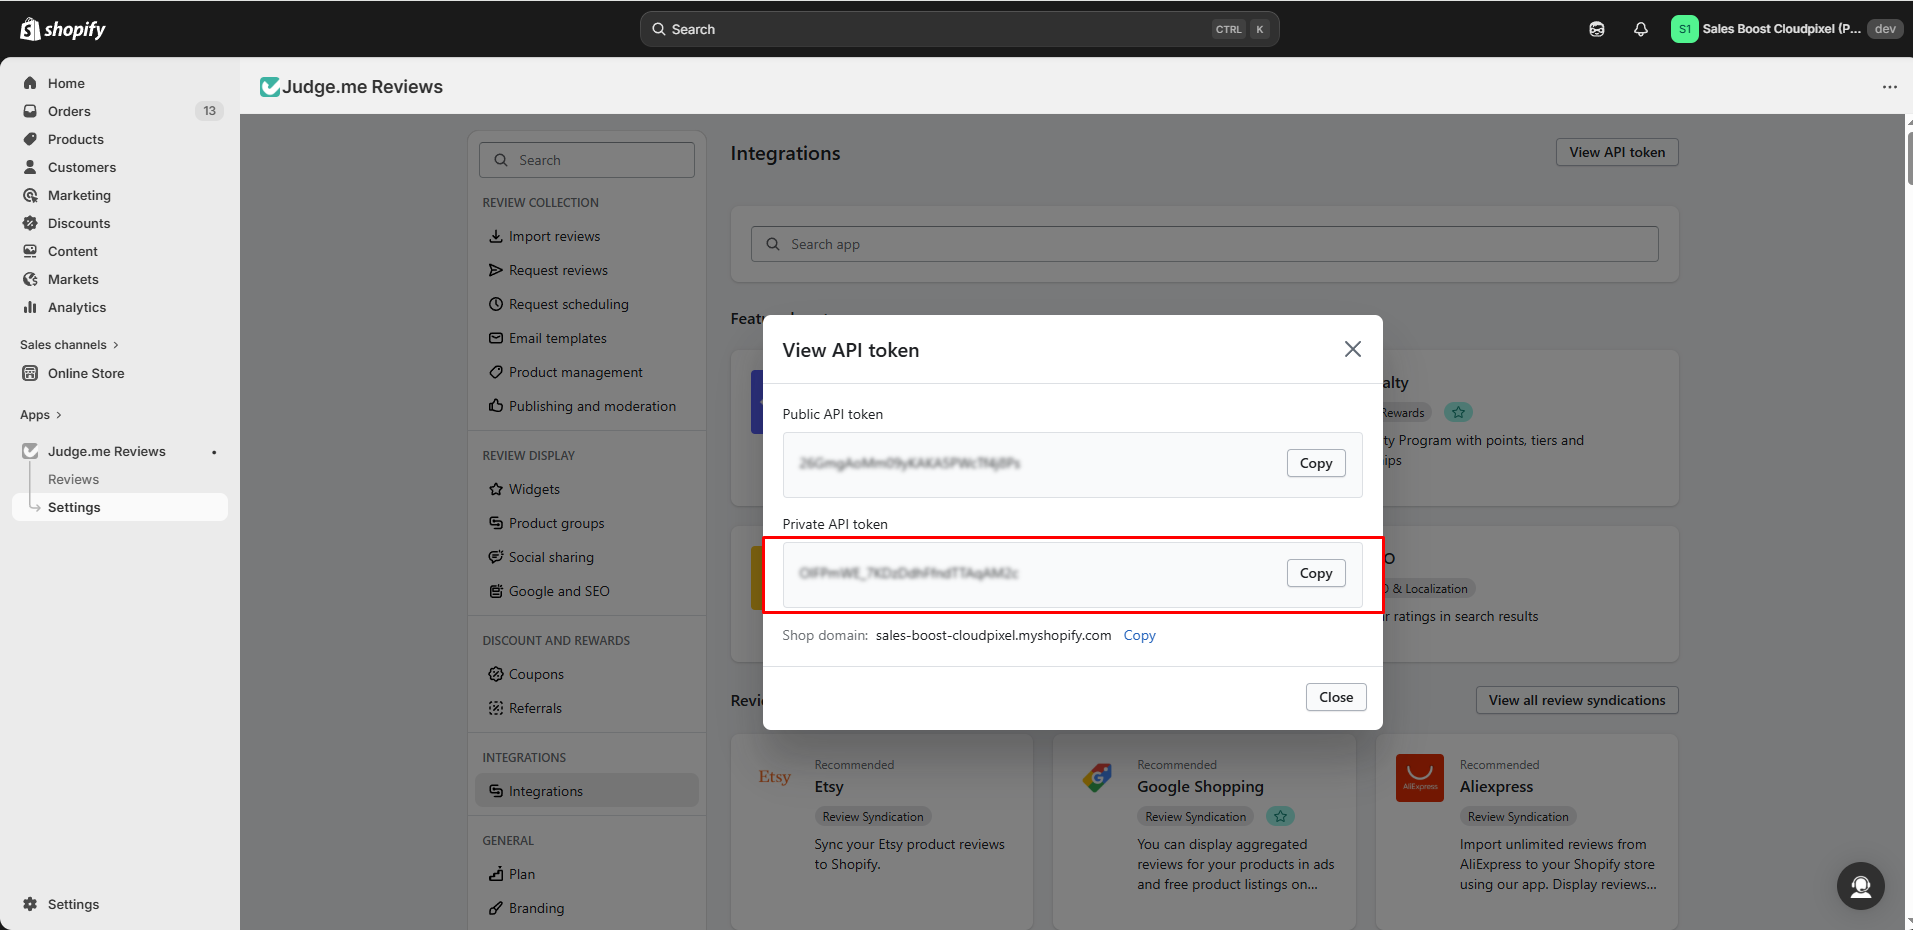
Step 2: Configure Judge.me API
- From Judge.me admin, go to General Settings > Integrations > View API token.
- Copy the Shop domain and Private token.

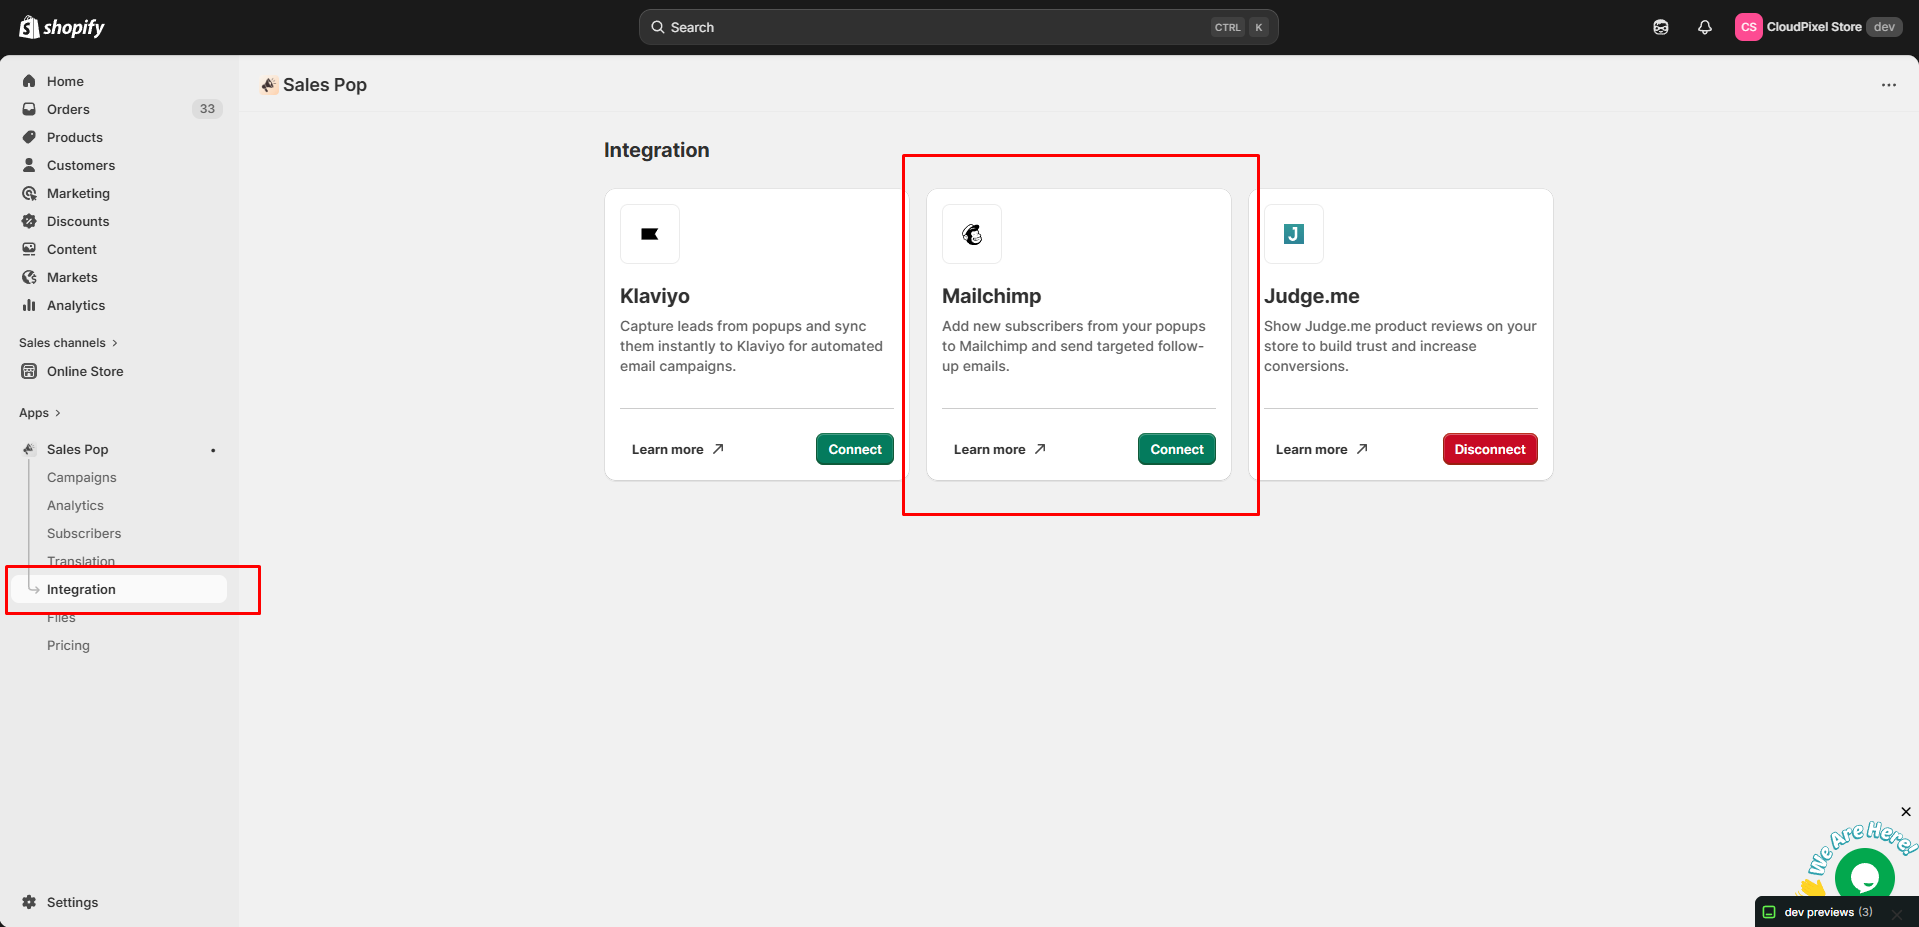
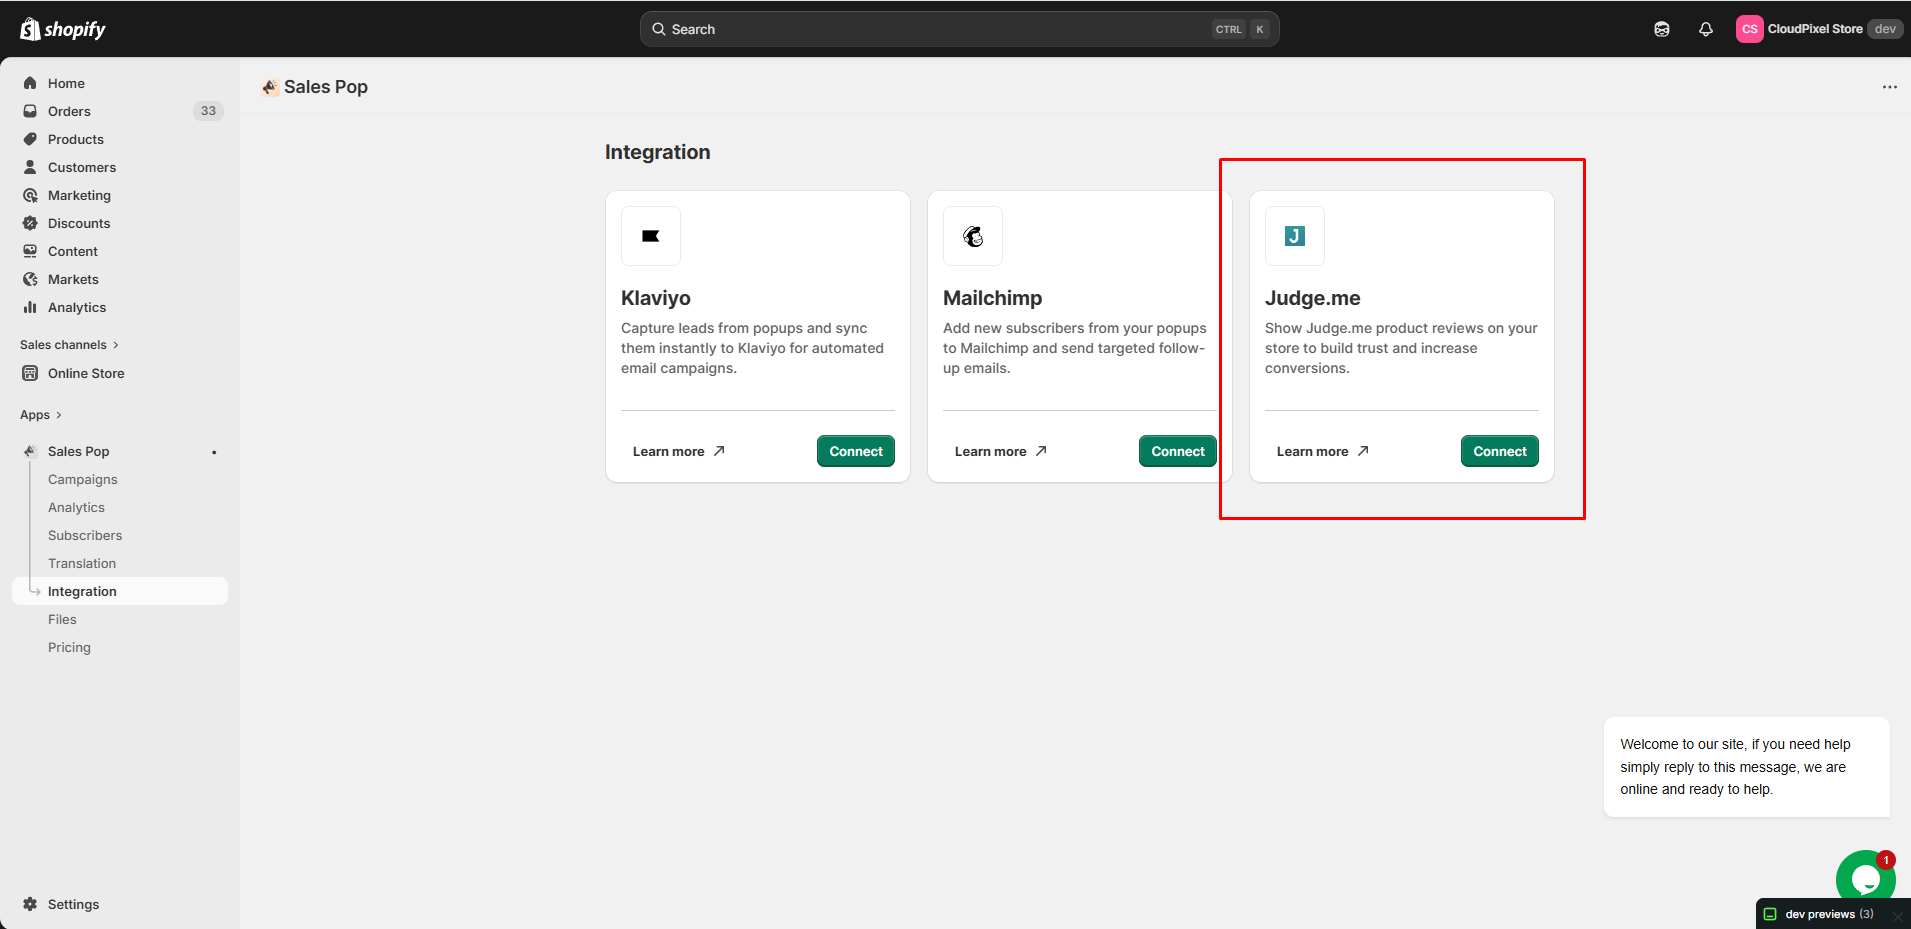
Step 3: Integrate with Sales Popup & Social Proof
- In “Integration” tab, choose Judge.me
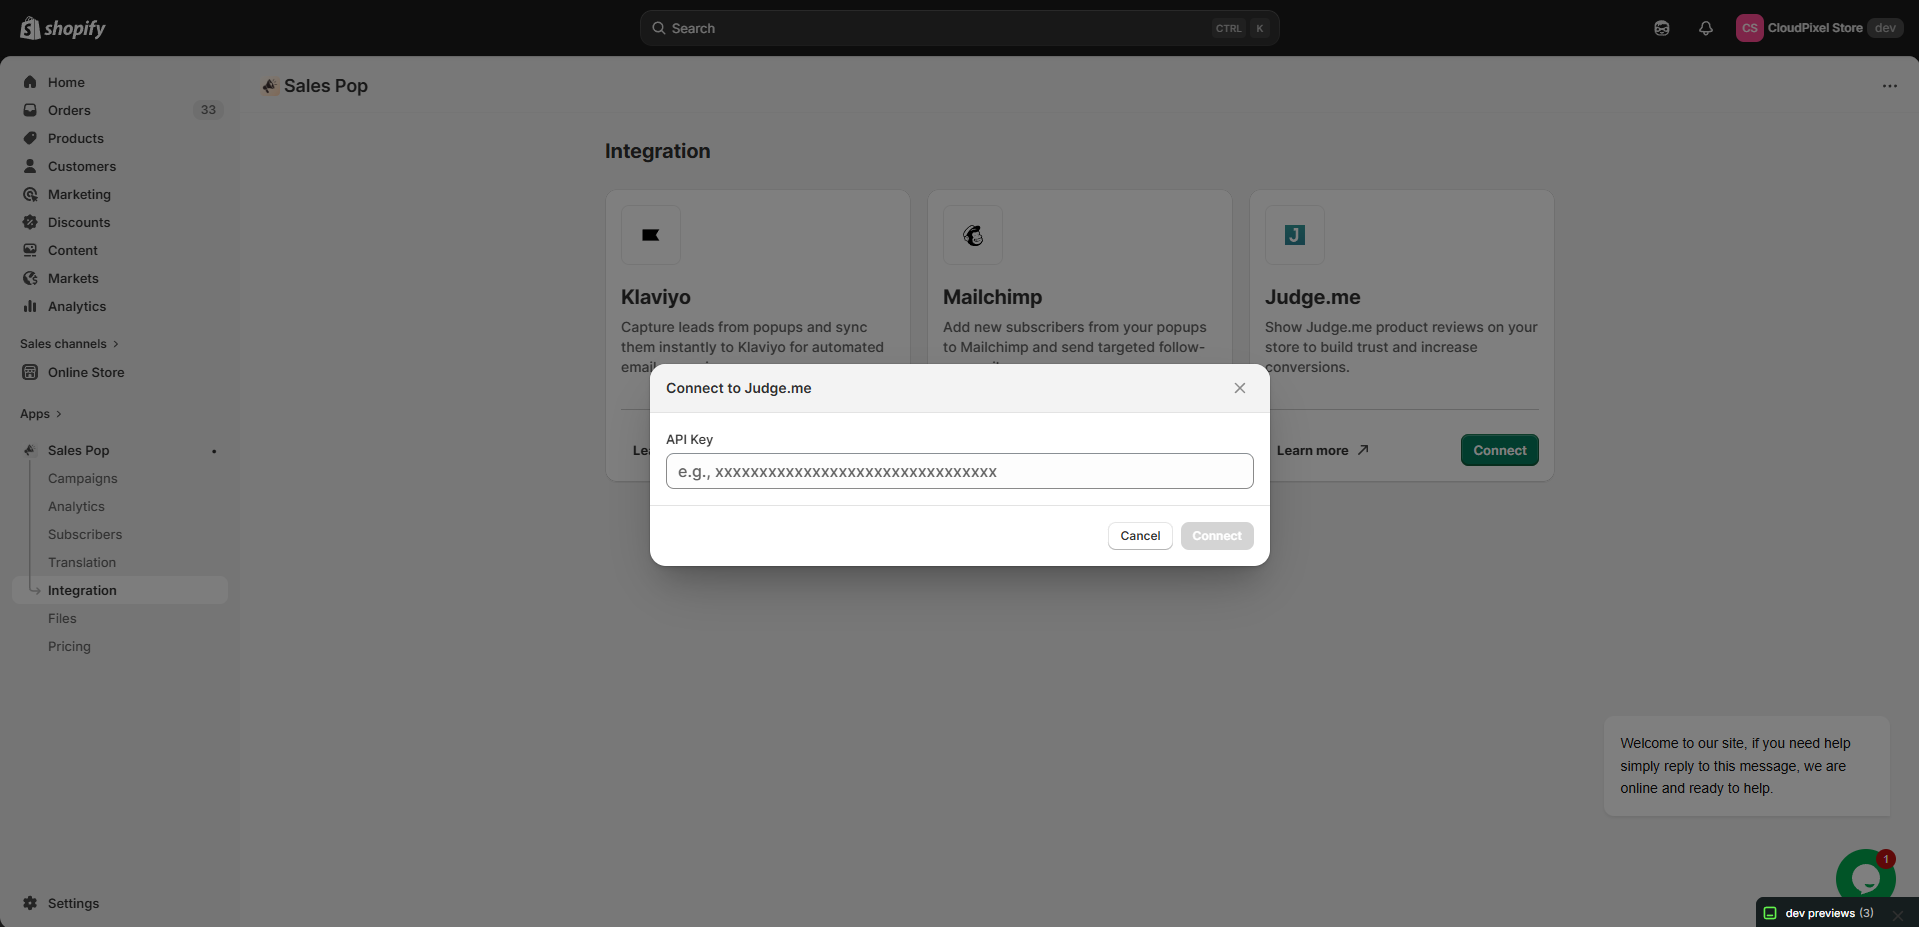
- Copy the API token to the field
- Click “Connect” and wait for the result
Step 4: Set up review notification
- Once done, you can go to Notification page, choose “Review notification” and start configure
- In Data tab of the Settings panel, choose “Sync Judge.me review” to get review data from Judge.me
Step 5: Activate the review notification
Make sure to enable the Sales Popup & Social Proof app-embed to see the notification with a review on the storefront.
Need more help?
If you experience any issues or have questions, please don’t hesitate to contact our support team at support@cloudpixelinfotech.com or through our live chat – we’re here to assist you!